
Getting Started: Project Creation and Metadata
If you want to use Publish Goods to create a book, a Journal issue or any other text document, you will first have to create a new project and fill in the basic information of it.
1. Project Creation
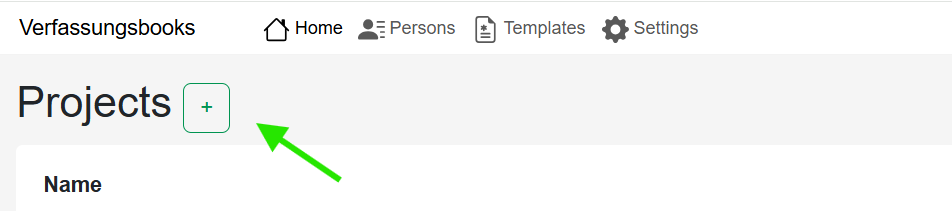 You can do so, by clicking on the "Plus" symbol next to "Projects"
Next, give your project a name.
After you have created the project, the name can no longer be changed!
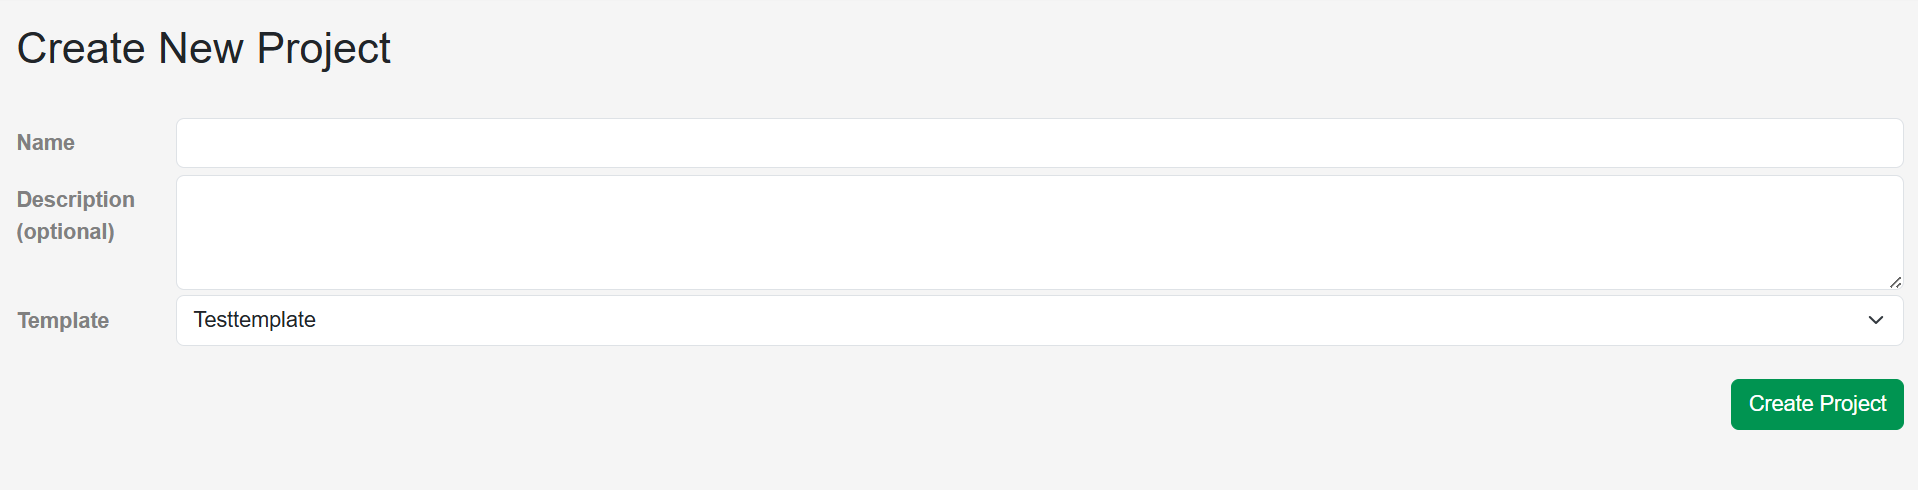 The name does not does not necessarily have to correspond to the publications title, which can always be changed at a later stage. It should primarily make the project for you distinguishable from other projects.
The description is optional.
You can already choose the template you want to use for this project. But no worries, you can easily change the template at a later stage in the project metadata!
2. Project Metadata
Before you start to import your content, you should make sure to fill out the project metada. This not only prevents that it'll be forgotten, but without basic metadata, the export does - for technical reasons - not work.
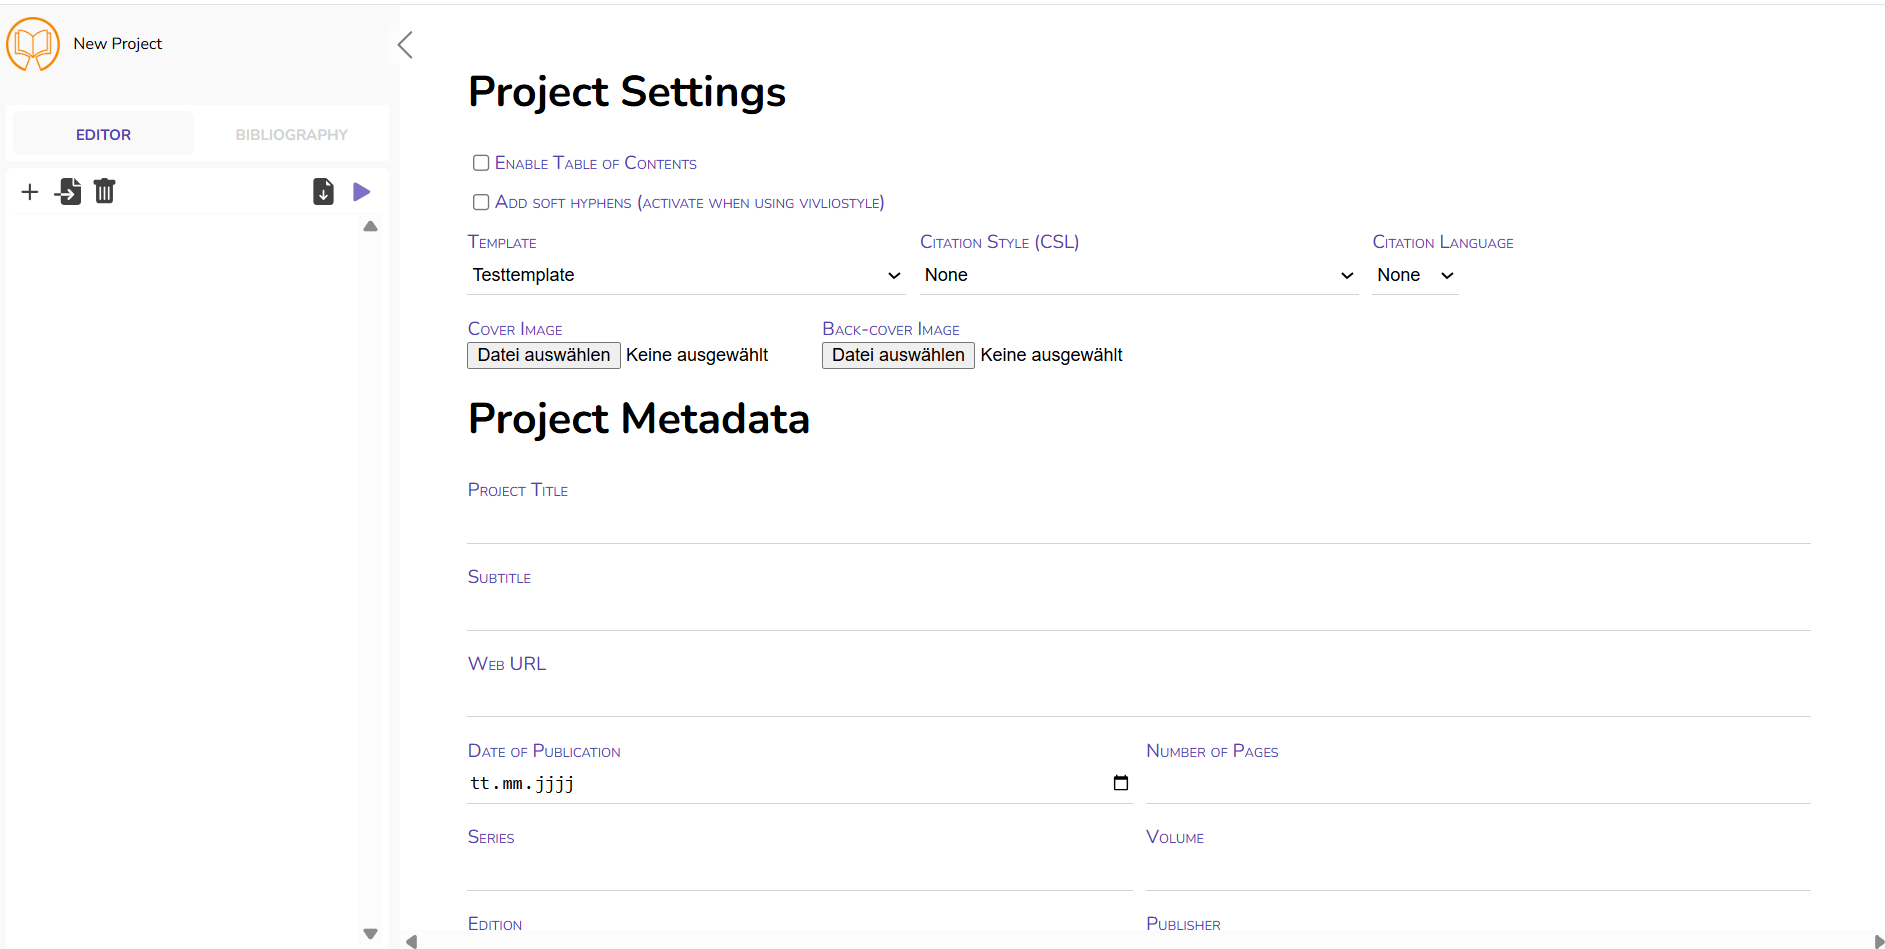 Simply fill in the information, if applicable.
"Enable Table of Contents": activate, if you want to include a Table of Contents in your publication
[KEANU/MIKA: stimmt das überhaupt? Verändert sich nichts, wenn ich das an oder aus habe]
"Add soft hyphens": If you work with Vivliostyle, please activate. Otherwise you can ignore this. The standard template provided by us does not rely on Vivliostyle.
"Template": Choose between different templates. For more information on templates, please refer to the Section "Template Documentation"
"Citation Style": Choose between a variety of existing citation styles. As administrator, you can also upload new citation styles.
"Citation Language": Some citation styles offer different language versions, e.g. translating "Author 1 and Author 2" in other languages.
"Cover Image": Here you can upload your front- and backcover. Images must not exceed 1 MB. Colours might be slightly altered, as Publish Goods works with CYMK.
"Title & Subtitle": Insert the title and subtitle of the planned publication
"Date of Publication": Insert the (planned) date of publication. Just like all other settings, this can of course be changed at any stage.
"Number of Pages": This might be counterintuitive, but Publish Goods cannot automatically count the number of pages of the exported file. Hence, just before you export the final version of your document, add the number of pages (which you know from pre-final versions). At the beginning, you can just leave this empty.
"Web URL": In case the contents you work with are already published in a different format, you could add the URL here. If this is not the case, just leave it empty.