
Getting Started: Project Creation and Metadata
If you want to use Publish Goods to create a book, a journal issueissue, or any other text document, you will first have to create a new project and fill in theits basic information of it.information.
1. Project Creation

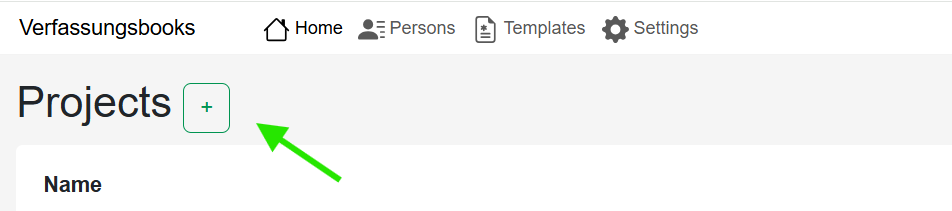 You can do so by clicking on the "Plus" symbol next to "Projects"
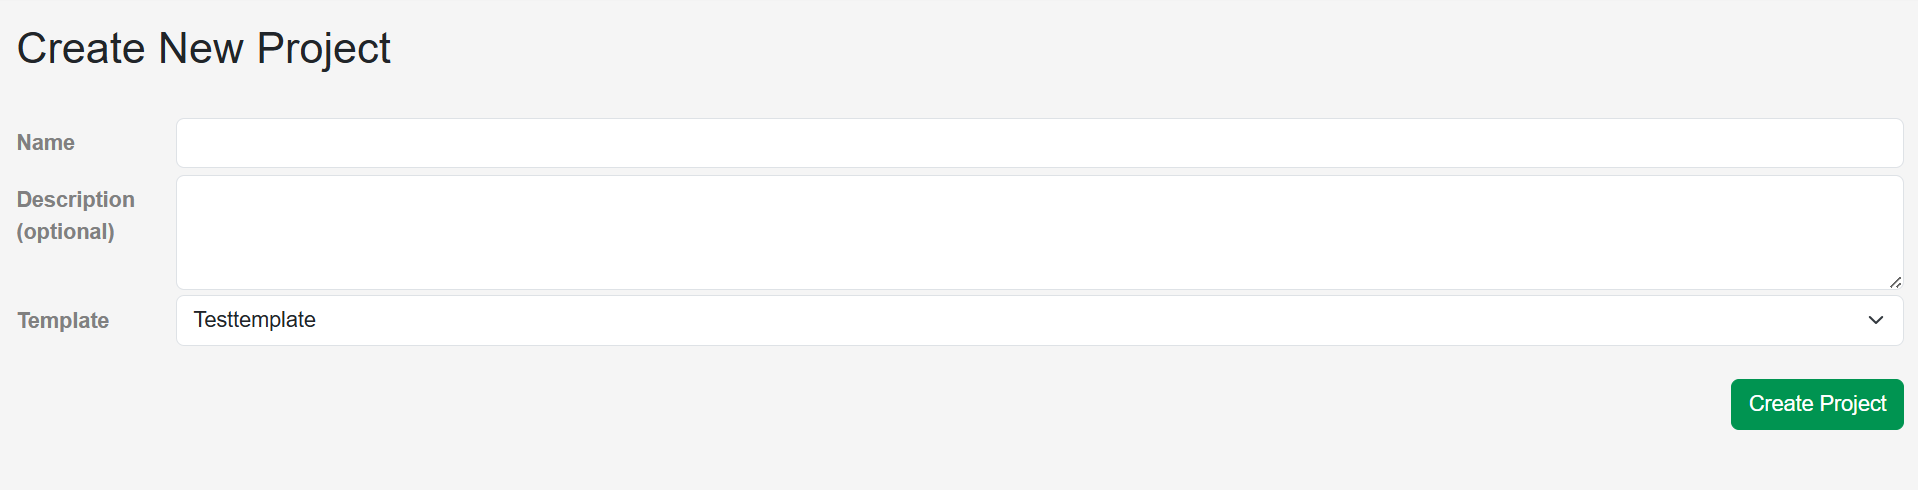
Next, give your project a name.
After you have createdOnce the project,project has been created, the name can no longer be changed!changed.
 The name does not
 have to necessarily have to correspond to the publication's title, which can always be changed at aany time later stage.on. It should primarily makehelp you distinguish the project distinguishable from other projects for you.projects.
The description is optional.
You can already choose the template you want to use for this project. But no worries,However, you can easily change the template at a later stage in the project metadata!metadata.
2. Project Metadata
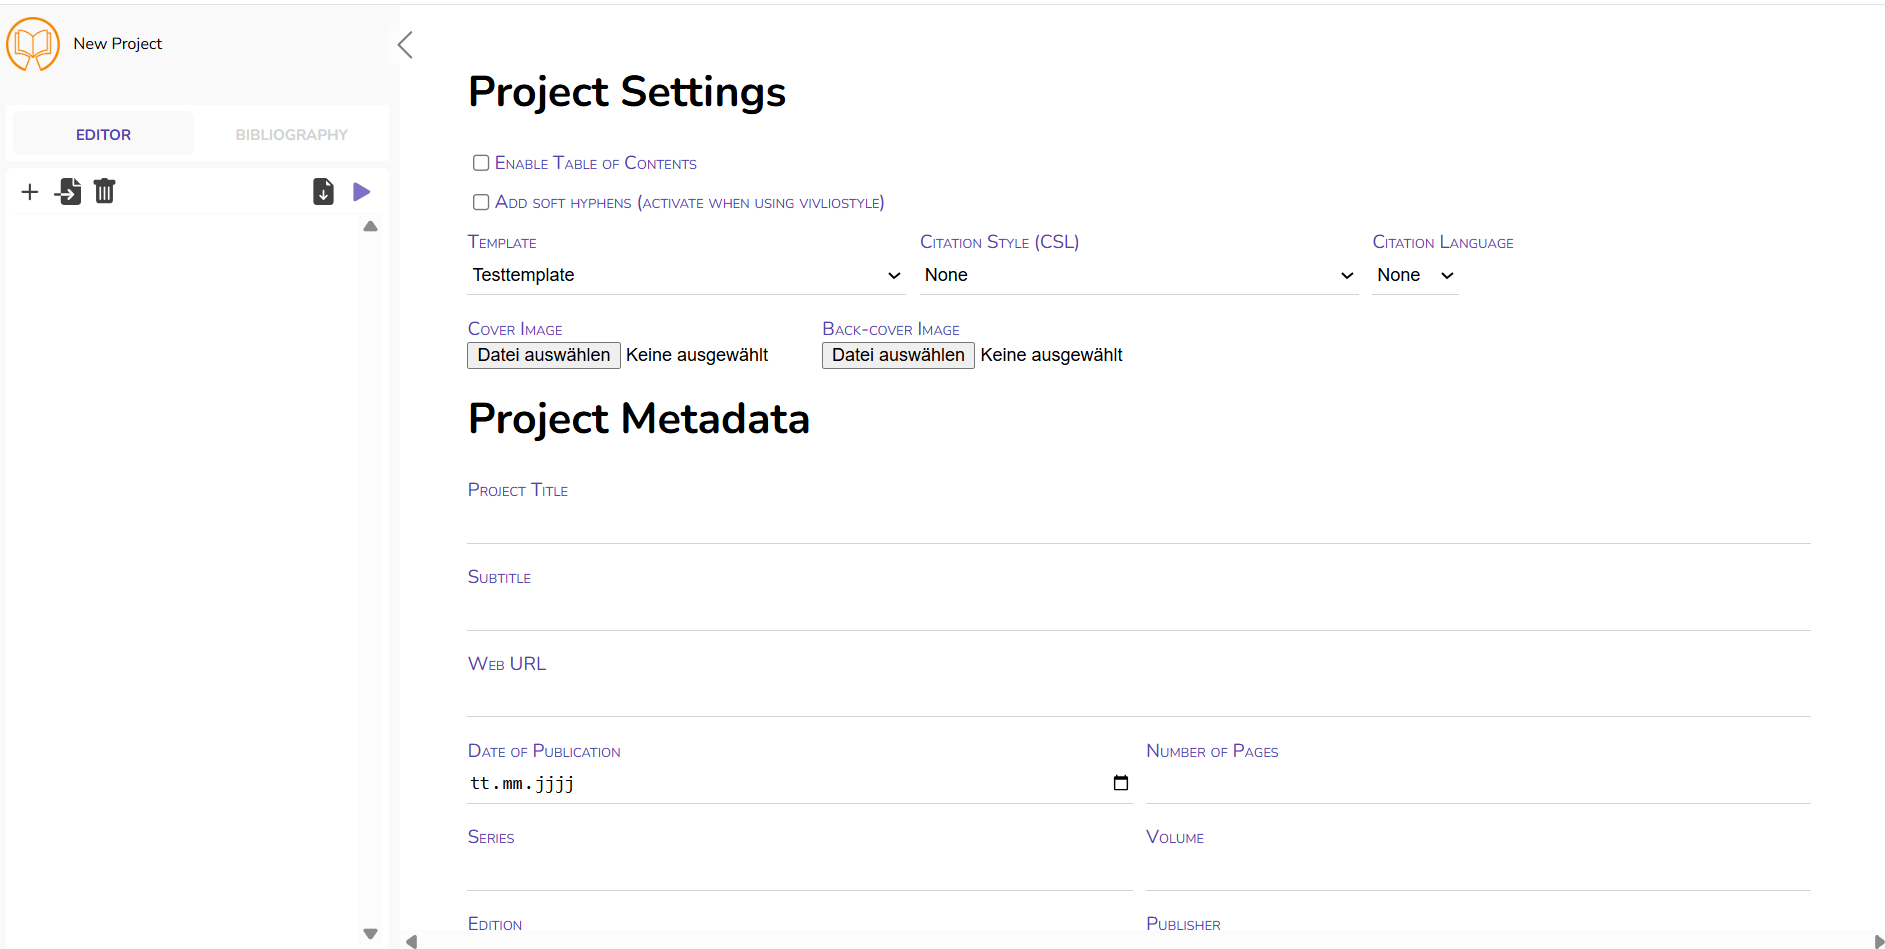
Before you start to importimporting your content, you should make sure to fill out the project metadata. This not only prevents it from being forgotten, but without basic metadata, the export does - for technical reasons - not work.
 Simply fill in the information,
 ifwhere applicable.
Enable Table of Contents: Activate,Activate this option, if you want to include a table of contents in your publication
[KEANU/MIKA: stimmt das überhaupt? Verändert sich nichts, wenn ich das an oder aus habe]
Add soft hyphens: If you work with Vivliostyle, please activate.activate this option. Otherwise you can ignore this. The standard template provided by us does not rely on Vivliostyle.
Template: Choose between different templates. For more information on templates, please refer to the section "Template Documentation"
Citation Style: Choose betweenfrom a variety of existing citation styles. As an administrator, you can also upload new citation styles.
Citation Language: Some citation styles offer different language versions, e.g. translating "Author 1 and Author 2" into other languages.
Cover Image: Here you can upload your front- and backcover. Images must not exceed 1 MB.
Colors mightmay beappear slightly altered,different, as Publish Goods works with CMYK.
Title & Subtitle: InsertEnter the title and subtitle of the planned publication
Date of Publication: InsertEnter the (planned) date of publication. Just likeLike all other settings, thisthe date can of course be changed at any stage.time.
Number of Pages: This mightmay beseem counterintuitive, but Publish Goods cannot automatically countdetermine the number of pages ofin the exported file. Hence,Therefore, justshortly before you exportexporting the final versionversion, of your document, addenter the total number of pages (whichbased youon willa know from pre-near-final versions)version). At the beginning, you can just leave this field empty.
Web URL: In caseIf the contentscontent you workare working with areis already published in a differentanother format, you couldcan add the URL here. IfOtherwise, leave this is not the case, just leave itfield empty.
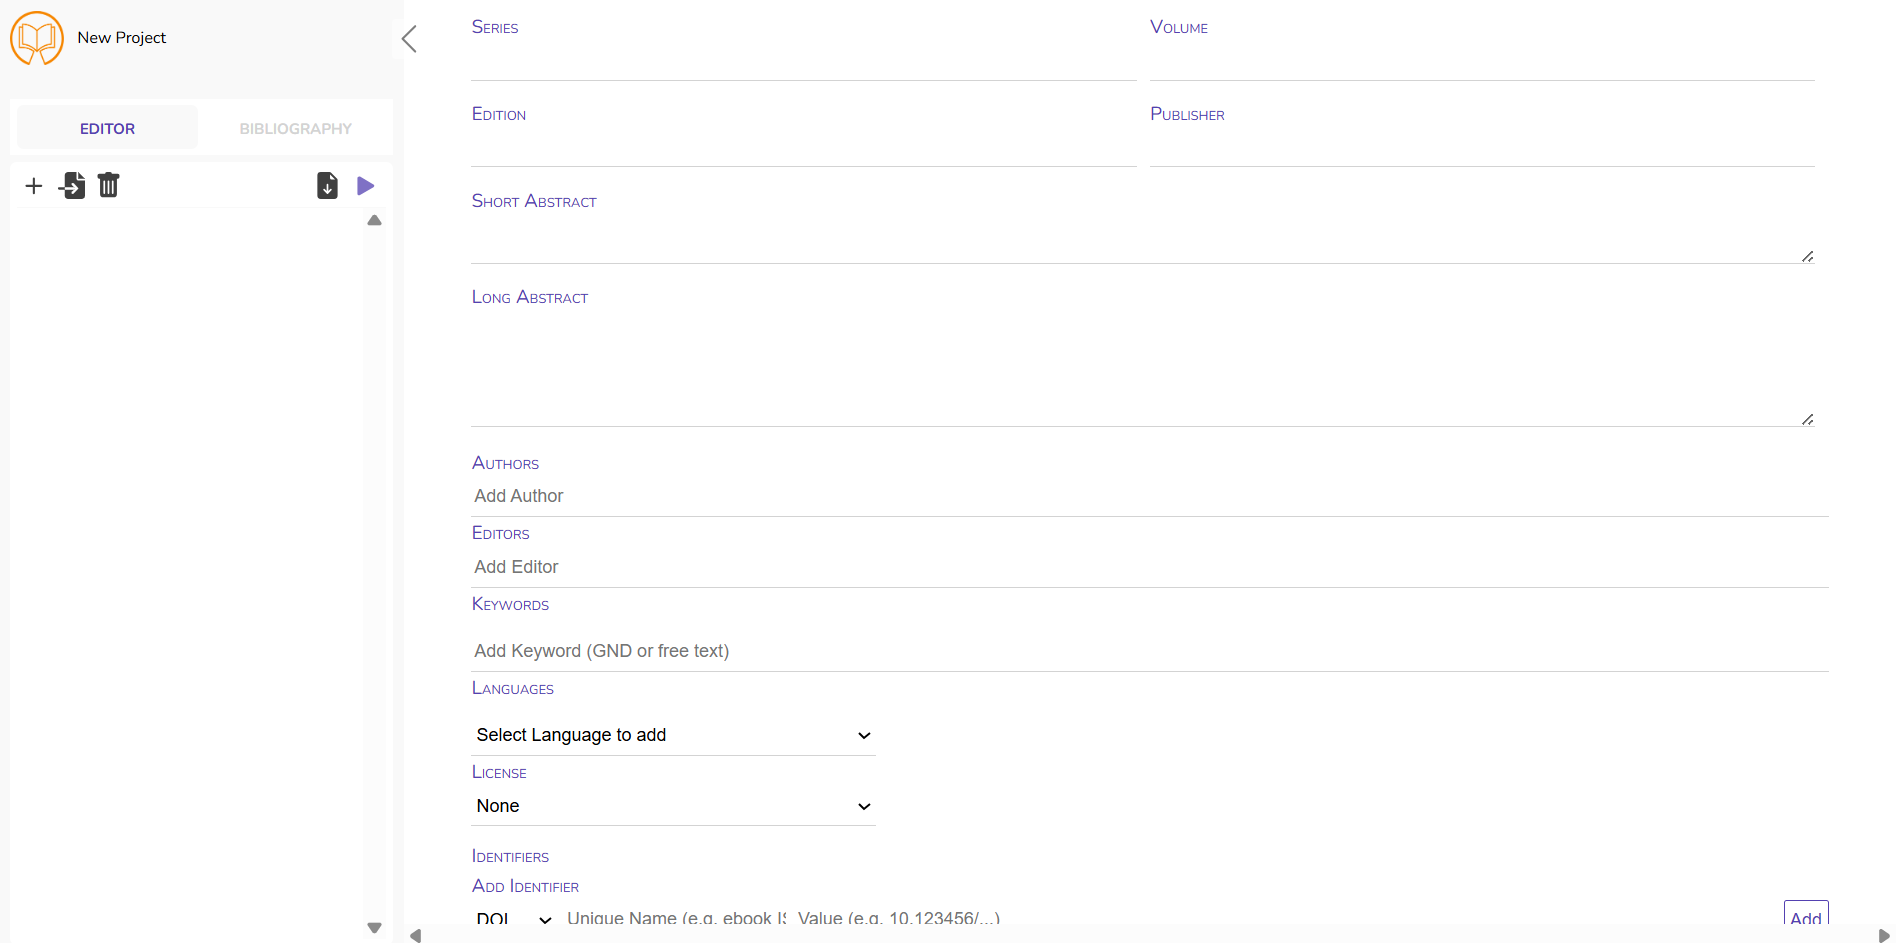 Series: If your publication is part of a series, add the name of the series here.
Volume: Indicate,Enter if applicable.
Edition: Indicate,Enter if applicable.
Publisher: IndicateSpecify whichthe organisation functionsacting as the publisher.
Short Abstract: The short abstract should not exceed 255 characters.
Long Abstract: The long abstract should not exceed 4,000 characters.
See "3. Persons" for how to create author profiles.
Keywords: ListEnter a number of keywords that describe your publication. You can choose from existing keywords in the GND database or add your own.
Language: Select the language of your publication. For hyphenation purposes, Publish Goods also recognizes the language automatically.
Licence: Select from the drop-down menu under which CCCreative licenceCommons (CC) license the project is published. You can learn more about CC-licenses here.
Identifiers: If your publication has persistent identifiers, add them here. Select the identifier type from the drop-down menu, addenter the name (e.g. DOI, ISBN, or adjust the name if applicable, e.g. ebook ISBN) and copy-paste the identifier into the "Value" field.

In the template settings, you can define that the persistent identifiers listed in the project metadata are automatically included in the imprint
After you click "Add", you can no longer change the information. Hence, if there is an error in the persistent identifier, delete the information (on the right, red trash can symbol) and add a new one.
DDC Classification: Select from the drop-down menu which discipline your publication belongs to. WhenOnce youselected, selectan one, a newadditional drop-down menu will appear automatically to select a subfield, and subsequently a sub-subfield. For a book on constitutional law, this might look like this: Social Sciences → Law → Constitutional & Administrative Law.

3. Entering Authors & Editors
Typically, your publication has authors and/or editors. You have two options to assign authors/editors to a project.
a) Entering the name directly
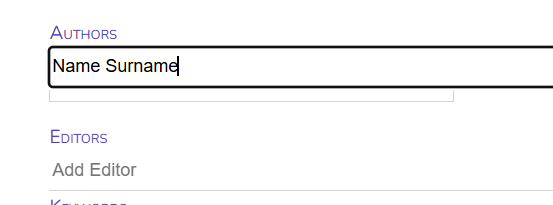 The fastest way is to simply enter the name in the text field. This is can be done in the project metadata (for the entire project) or for each section (e.g. for edited volumes, journals articles, etc.)
After you press "Enter", the name will appear as element under "Authors".
You can adjust the order of authors per drag-and-drop. 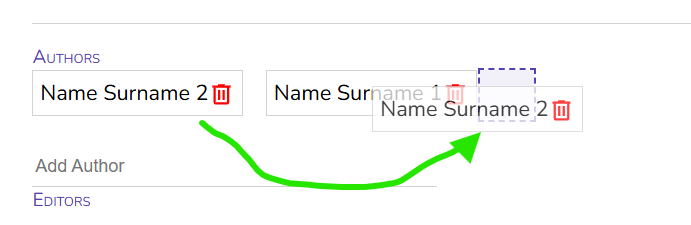
You cannot change the authors name, once it is entered. However, you can easily delete the name by clicking on the trash can symbol and add a new one.
b) Creating Person Profiles
Entering the persons name directly in the project/section metadata is the fastest way, but also has shortcomings: There is the risk of typos, of incoherences (e.g. John J. Doe vs. John Doe, etc.) and typos, moreover you have to type in the authors name all the time. By creating profiles for authors and editors, you build up a database that can be used throughout all your projects and gives you additional possibilities, such as displaying a authors bio or ORCID. Wether and how these information are displayed depends on the template you are using.
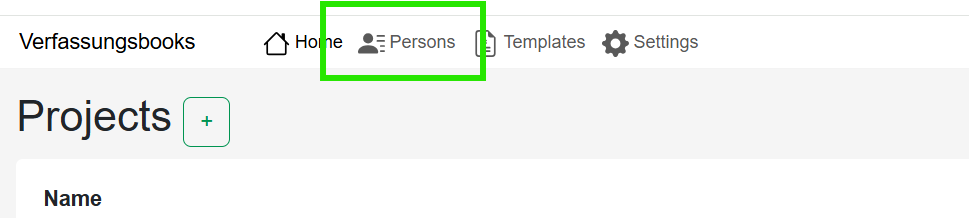 To create a person profile, go to the project overview page and click on persons in the top menubar.
Add new persons profiles by clicking on the plus-symbol.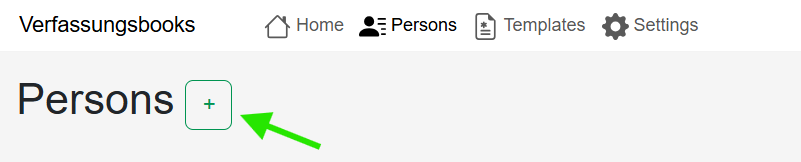
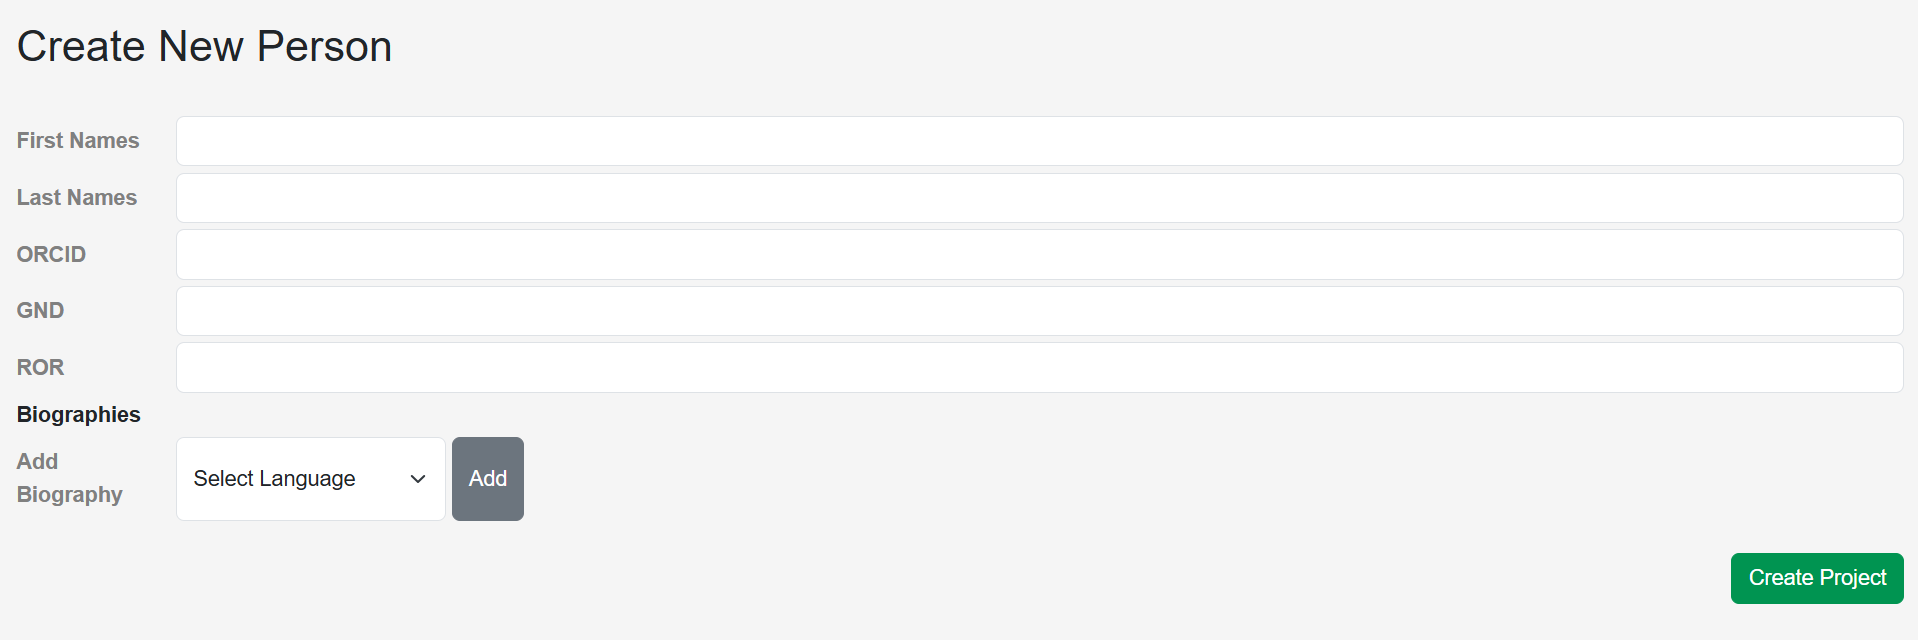 You can now enter the persons name, last name, as well as identifiers like ORCID, GND and ROR.
Only the last name is a mandatory field.
When you entered all information click on "Create Project".
Currently, the authors biography cannot be directly added. Click first on "Create Project" and follow the steps described below.
After the persons profile is created, you are automatically redirected to the persons overview page, where you can find all existing profiles. If you want to edit the profile or add a bio, simply click on the profile and a small menu will apear on the right.
S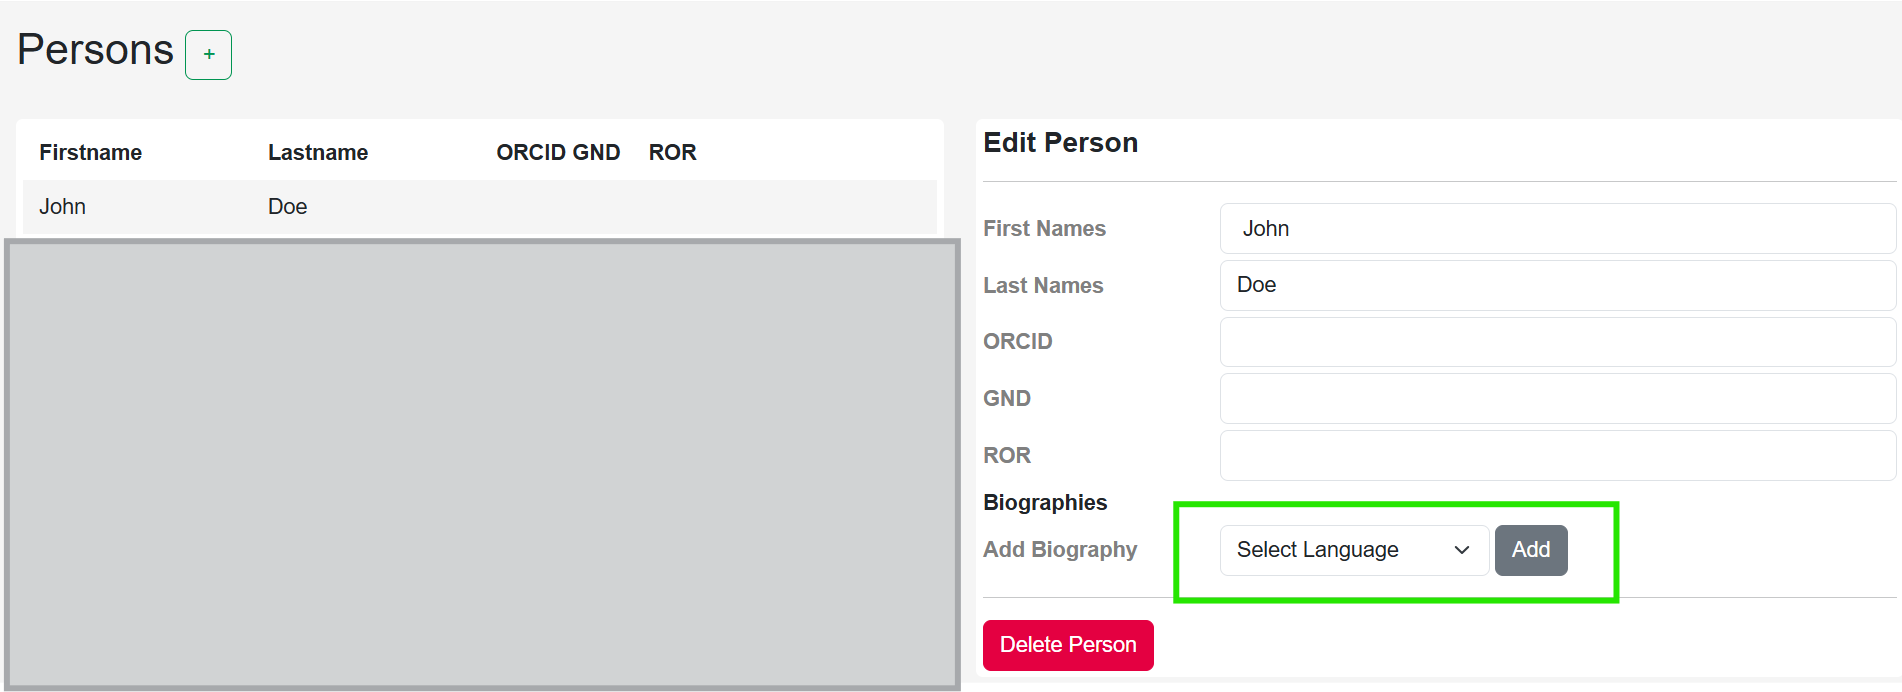 elect the language of the bio in the drop-down-menu and click on "Add". A text field will then appear where you can enter the authors bio.
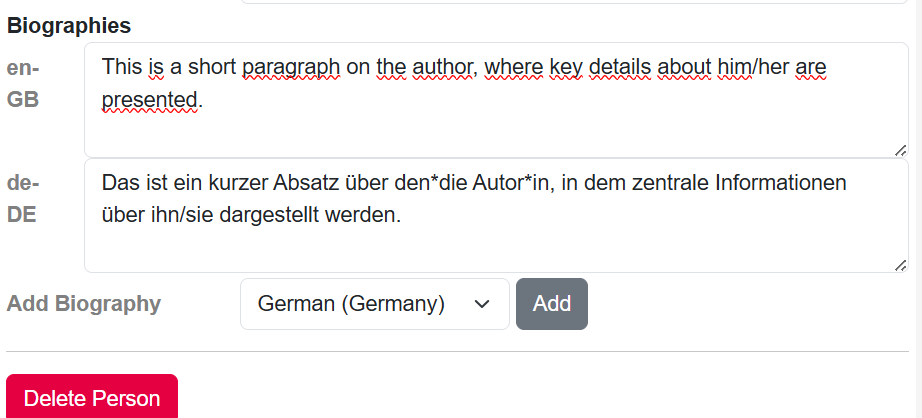 You can of course also add several language versions of the authors bio. Which language is displayed in your publication (e.g. in the list of authors) depends on the language selection of your project and, more importantly, your template settings.
All changes are saved automatically.